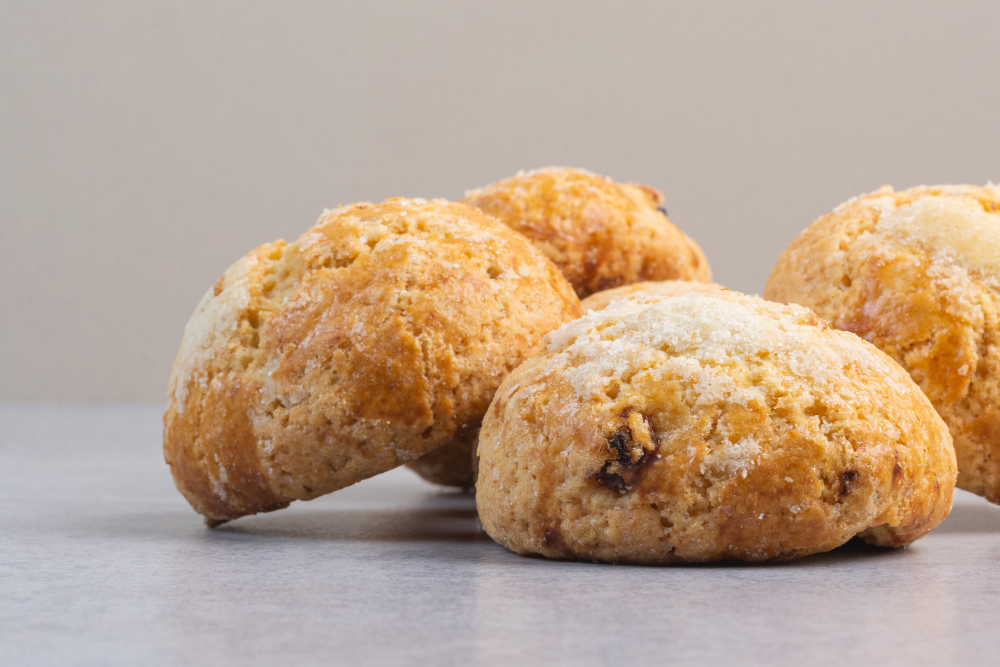
Scones are a beloved treat that are perfect for breakfast, tea time, or even a light snack. With their crumbly yet soft texture, they are often paired with jam, butter, or cream. Making the fluffiest scones may seem daunting at first, especially if you’re new to baking, but with the right technique, it’s possible to create perfect scones every time. This beginner’s guide will take you through the steps, tips, and tricks for baking the fluffiest scones you’ve ever tasted.
Why This Recipe Is Perfect for Beginners
Baking scones doesn’t have to be intimidating. With a few simple ingredients and easy steps, you can bake delicious, fluffy scones that will impress your family and friends. The focus keyphrase of this post, “fluffiest scones,” will guide you through the essential techniques to make sure your scones turn out light, airy, and full of flavor. Whether you’re making them for a special occasion or simply because you’re in the mood for a tasty treat, this guide will ensure your scones are a success.
Ingredients for the Fluffiest Scones
Before you start, gather your ingredients. The key to making the fluffiest scones is using the right proportions of ingredients and handling the dough as little as possible. Here’s what you’ll need:
- 2 cups all-purpose flour
- 1/4 cup granulated sugar
- 1 tablespoon baking powder
- 1/2 teaspoon salt
- 1/2 cup cold unsalted butter, cubed
- 2/3 cup heavy cream (plus extra for brushing)
- 1 large egg
- 1 teaspoon vanilla extract
- 1/2 cup of your choice of add-ins (raisins, currants, or chocolate chips)
These ingredients will give you a basic scone dough that can be easily customized with your favorite add-ins. You can also substitute ingredients like buttermilk for heavy cream or add a little zest for extra flavor.
Step 1: Preheat the Oven and Prepare the Baking Sheet
Start by preheating your oven to 400°F (200°C). A hot oven is essential to ensure your scones bake up perfectly and get that golden brown top. Line a baking sheet with parchment paper or a silicone baking mat for easy cleanup and to prevent sticking.
Step 2: Combine the Dry Ingredients
In a large bowl, whisk together the all-purpose flour, sugar, baking powder, and salt. The baking powder is the key to making the fluffiest scones, so make sure it’s fresh and properly mixed into the flour.
Step 3: Cut in the Cold Butter
This is one of the most important steps in making the fluffiest scones. The cold butter creates pockets of air in the dough, which is what makes the scones light and fluffy. Using a pastry cutter or two forks, cut the cold unsalted butter into the dry ingredients until the mixture resembles coarse crumbs.
You can also use your fingers to rub the butter into the flour, but be careful not to overwork the dough. The less you handle the dough, the fluffier the scones will be.
Step 4: Add Wet Ingredients
In a separate bowl, whisk together the heavy cream, egg, and vanilla extract. Gradually pour this wet mixture into the dry ingredients. Stir gently with a spoon or spatula until the dough just comes together. Be careful not to overmix—it’s important to leave some floury bits in the dough, which will contribute to the scone’s texture.
If you’re adding raisins, currants, or chocolate chips, fold them in at this point, making sure they are evenly distributed throughout the dough.
Step 5: Turn the Dough Out and Shape It
Once the dough comes together, turn it out onto a lightly floured surface. Gently knead the dough a few times to bring it together, but avoid overworking it. Press the dough into a thick disc that’s about 1 inch (2.5 cm) thick.
Use a sharp knife or a round biscuit cutter to cut the dough into 8 wedges or rounds, depending on the shape you prefer. Place the scones on the prepared baking sheet, leaving a little space between each one so they have room to expand.
Step 6: Brush with Cream and Bake
For a beautiful golden finish, brush the tops of the scones with a little extra heavy cream. This will give them a shiny, appetizing top as they bake.
Bake the scones in the preheated oven for 15-18 minutes, or until they are golden brown on top and a toothpick inserted into the center comes out clean. The baking time may vary depending on your oven, so keep an eye on them towards the end.
Step 7: Cool and Serve
Once your scones are baked, remove them from the oven and let them cool on a wire rack for a few minutes. Serve them warm with a dollop of jam, clotted cream, or a drizzle of honey for the perfect treat.
How Many People Can You Serve with This Recipe?
This recipe yields 8 scones, which is enough to serve 4-6 people, depending on how large you cut them. They’re perfect for a small gathering or a family breakfast, and you can easily double the recipe if you need to make more.
Nutrition Facts (Per Scone)
- Calories: 240
- Total Fat: 12g
- Saturated Fat: 7g
- Cholesterol: 45mg
- Sodium: 180mg
- Carbohydrates: 31g
- Fiber: 1g
- Sugar: 7g
- Protein: 3g
Keep in mind that these are estimates and may vary depending on the specific ingredients and add-ins you choose.
Tips for the Fluffiest Scones Every Time
- Use Cold Ingredients: Cold butter and cream are essential to achieving the fluffiest scones. The cold butter will melt during baking and create steam, which helps the scones rise and become airy.
- Don’t Overwork the Dough: Overworking the dough can result in tough scones. Mix the ingredients just until they come together.
- Chill the Dough: If you have time, chill the dough for 10-15 minutes before baking. This helps the scones maintain their shape and gives them an even lighter texture.
- Customize Your Scones: Add-ins like lemon zest, dried fruit, or chocolate chips are great ways to customize your scones and make them uniquely your own.


